Decode
Getting Started
What is Decode?
Decode is a full-stack toolkit for developing internal tools in React. Internal tools are the stuff that employees at companies use, like customer support dashboards or ops tools.
You can logon to Decode and connect your HTTP APIs and databases. Then, you can write queries against those resources. For each query, Decode will provision a secure endpoint. You can read/write from that endpoint with Decode's client-side React SDK.
Let's build an app
In this tutorial, we're going to build a tool for a bank, Spacebank. This tool is used by the bank's risk team to mark transactions as fishy 🐟. Admins work through a table of transactions that they can sort and filter. They can mark a transaction as fishy/not fishy:
We'll make use of the following Decode features to bring this app to life:
- Zero-config authentication
- Direct database queries
- Decode hooks
- Decode components with built-in data fetching
⏱️This tutorial will take about 10 minutes to complete.
The React app
You'll find a fresh, incomplete version of Spacebank over on this Codesandbox:
https://codesandbox.io/s/github/usedecode/spacebank-client?file=/pages/index.tsx
The basic styles are in place, and some components are laid out. But this app isn't connected to any back-end data sources. Let's change that.
Resources
When you first sign-up for Decode, we pre-populate your account with two resources.
A resource can be either an HTTP API or a database (Postgres, MySQL, or MSSQL).
If you head over to the Resources view, you'll see the two resources listed:
- Spacebank API
- Spacebank db
For this app, you'll use direct database queries for most of your reads. And you'll use the API for your writes (eg, marking a transaction as "Fishy").
This is common practice for internal tools. Composing database queries with Decode is fast and easy, and we can avoid needing to write bespoke endpoints to power this tool. For writes, often teams prefer using their API so they can run queries through application-level validation and ensure data integrity.
You don't need to make any changes to the resources. But let's see how they're each setup.
API resources
Click on the "Spacebank API" resource and you'll see how APIs are specified in Decode:
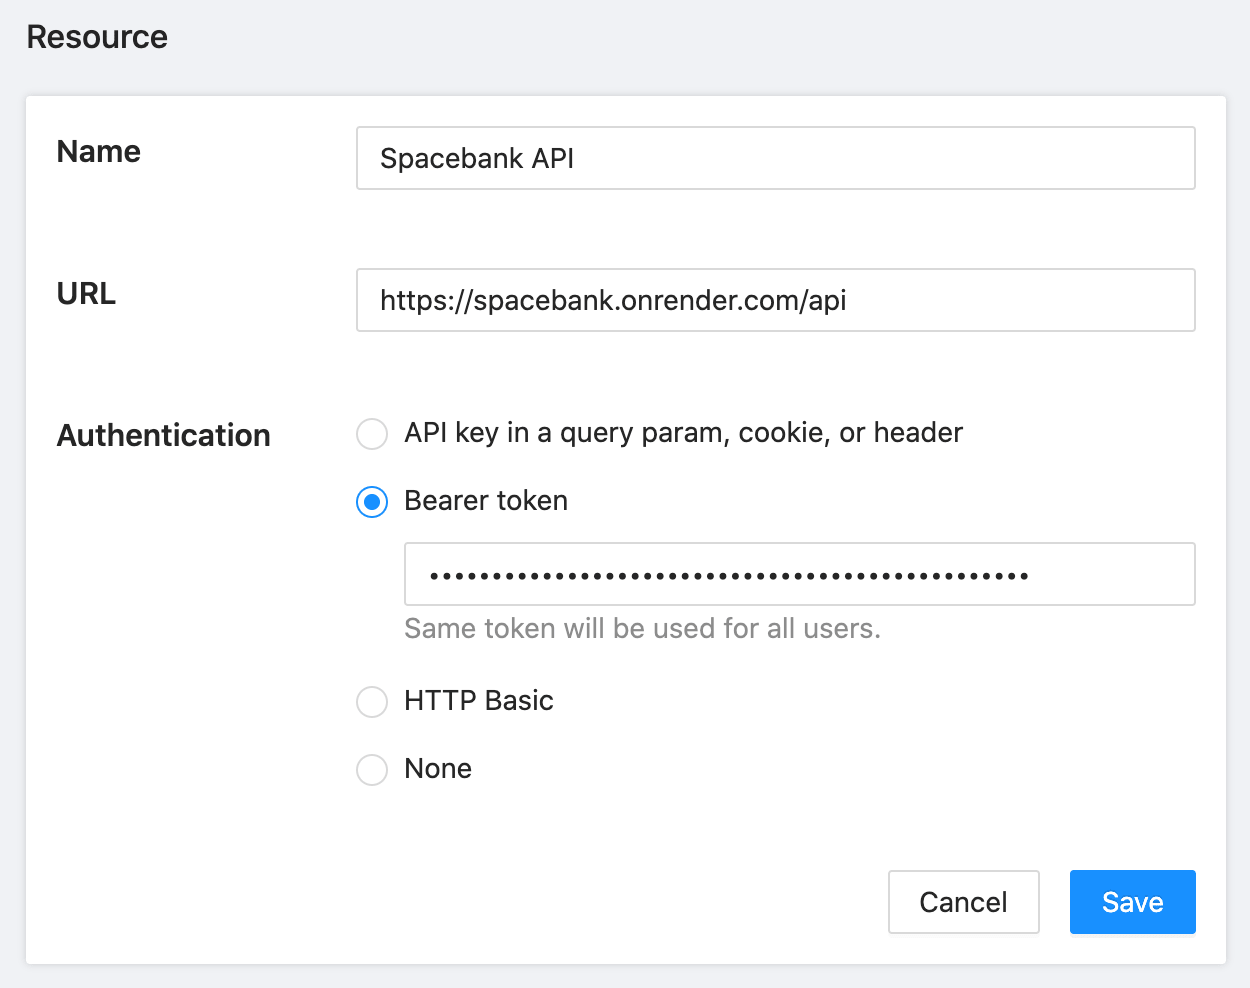
The Spacebank API resource.
For APIs, you specify:
- The base URL of the API
- The security scheme Decode can use to connect to the API
Decode supports a variety of authentication schemes, but if you don't see your desired scheme listed just let us know.
Decode will use the same security scheme to call the API resource for every user. If you want to have user-dependent authentication, we'd love to hear your use case.
Database resources
Next, click on the "Spacebank db" resource. For databases, note you just specify the connection details:
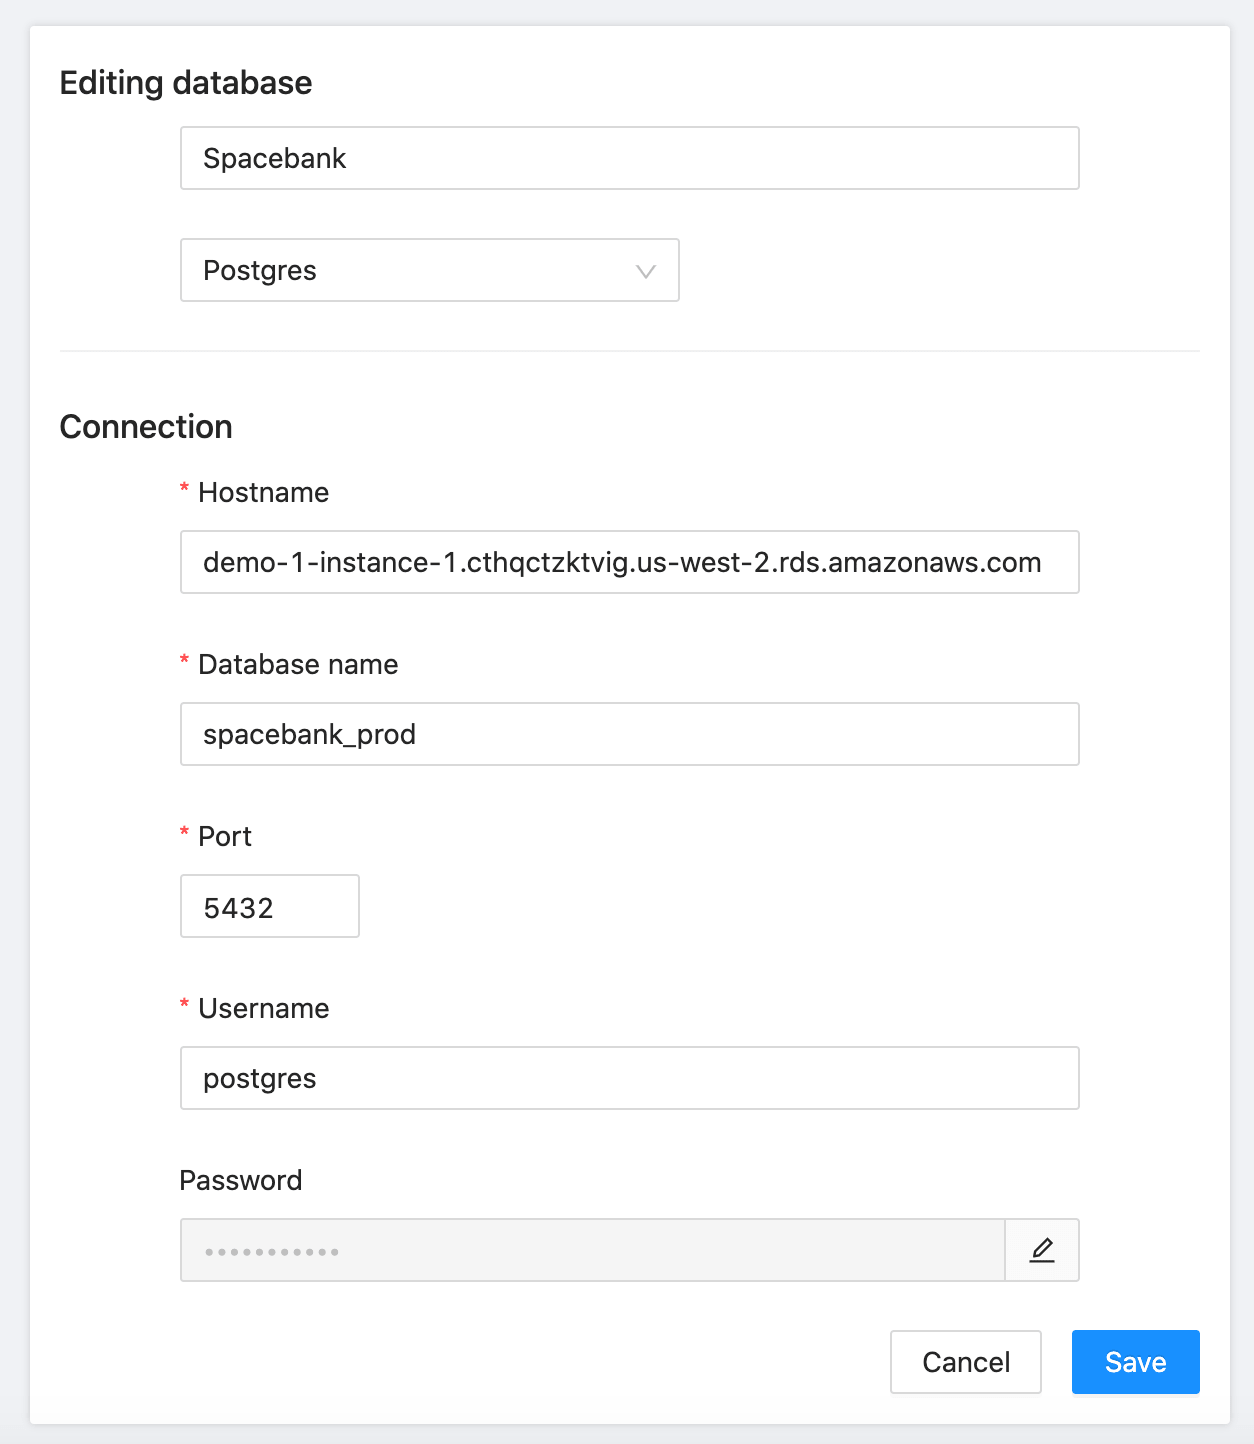
The Spacebank database resource.
In just a moment, we'll see how we use the Decode client library to securely route requests through Decode and to our two resources:
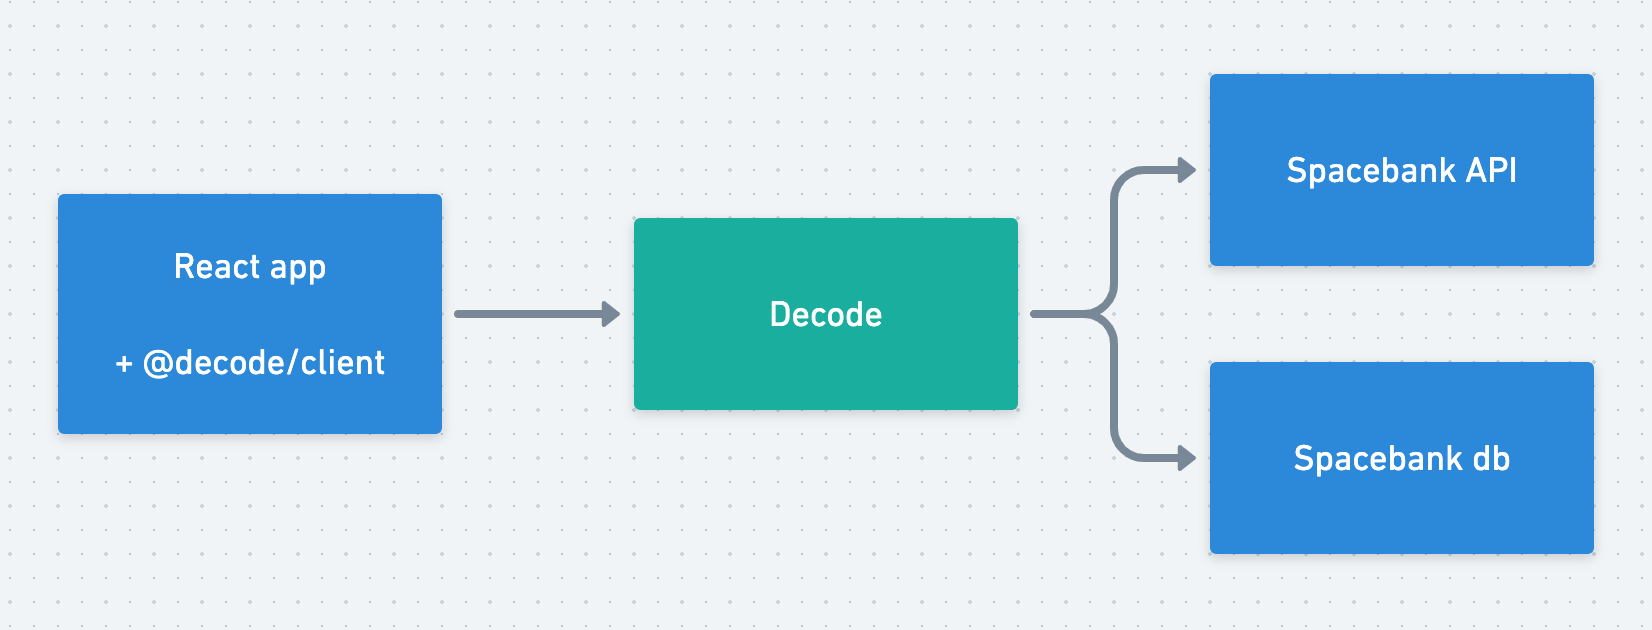
But first, you need to define your first query.
Your first query
Your first task is to add a table to Spacebank that displays the transactions from the transactions table in the Spacebank database.
In order to do that, you need to compose a query. A query is how we fetch data from a resource. For HTTP APIs, a query is a request description, eg GET /transactions. For databases, a query is a SQL statement.
Head over to Queries and select "+ Add your first query." Select the Spacebank database. You'll be prompted with the query editor for SQL:

The query editor, where we'll add our first query.
Under Endpoint, fill in listTransactions. This will be the slug of the query. You'll see how this slug comes into play in just a moment.
Under Query, write your SQL query. The Spacebank database has a table called transactions. To start, you can just grab all the transactions like this:
SELECT * FROM transactions order by inserted_at desc limit 10000;
Now, click the Test button. You'll see a panel with the label "✅ Result" appear:

After clicking test, the Result panel will appear.
Click on the panel to slide it open. You'll see a formatted JSON response. This is a preview of the JSON that this query will return to our React front-end:

The JSON returned by this query. Note that we store tags - like whether or not the transaction is fishy - in another table.
This looks good. Go ahead and click "Save."
And just like that, you've turned a SQL query into an API endpoint. It's protected by a layer of authentication. If you tried to just curl this endpoint, you'd get an error:
$ curl -X POST https://api.usedecode.com/e/listTransactions
{
  "error": {
    "summary": "Authorization failed. Did you include a token in your headers like: `Authorization: Bearer {{token}}`?"
  },
  "ok": false
}
Adding authentication to an app and fussing with API tokens is always a pain. Luckily, Decode makes this as simple as possible.
Easy authentication with <DecodeProvider />
It's time to start editing the Spacebank React app. Again, the Codesandbox for that is here:
https://codesandbox.io/s/github/usedecode/spacebank-client?file=/pages/_app.tsx
You'll only be editing two files in this tutorial:
pages/_app.tsxpages/index.tsx
The rest of the project provides style and helper components.
To add authentication to the app, all you have to do is wrap the top-level component inside pages/_app.tsx with <DecodeProvider /> , like this:
function MyApp({ Component, pageProps }) {
  return (
    <DecodeProvider>
      <Component {...pageProps} />
    </DecodeProvider>
  );
}
This app uses Next. The component here will always be the top-level component in the tree.
For projects using Create React App, you do the same thing - but wrap your components at the top-level inside index.js.
When you save, it will look like nothing has happened. But that's because you're already logged into Decode in this browser, so <DecodeProvider /> validated you were logged . This all happened so fast, you probably didn't even notice!
To prove it, copy the Codesandbox URL, which you can find here:
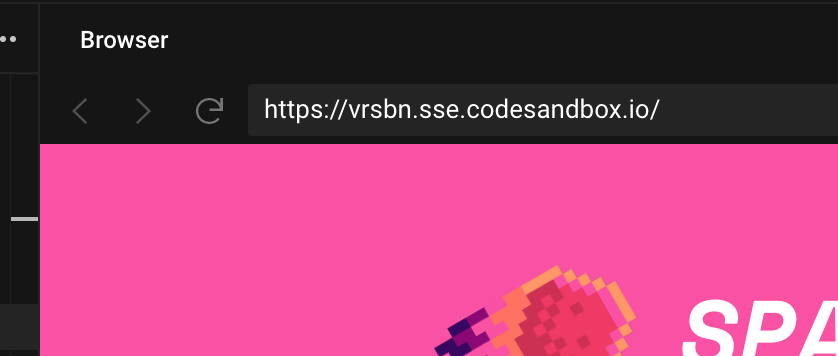
Then, open an "incognito" or "private" browser window (CMD + SHIFT + N on the Mac in most browsers). Paste in the URL - and now you're redirected to the Decode login page:
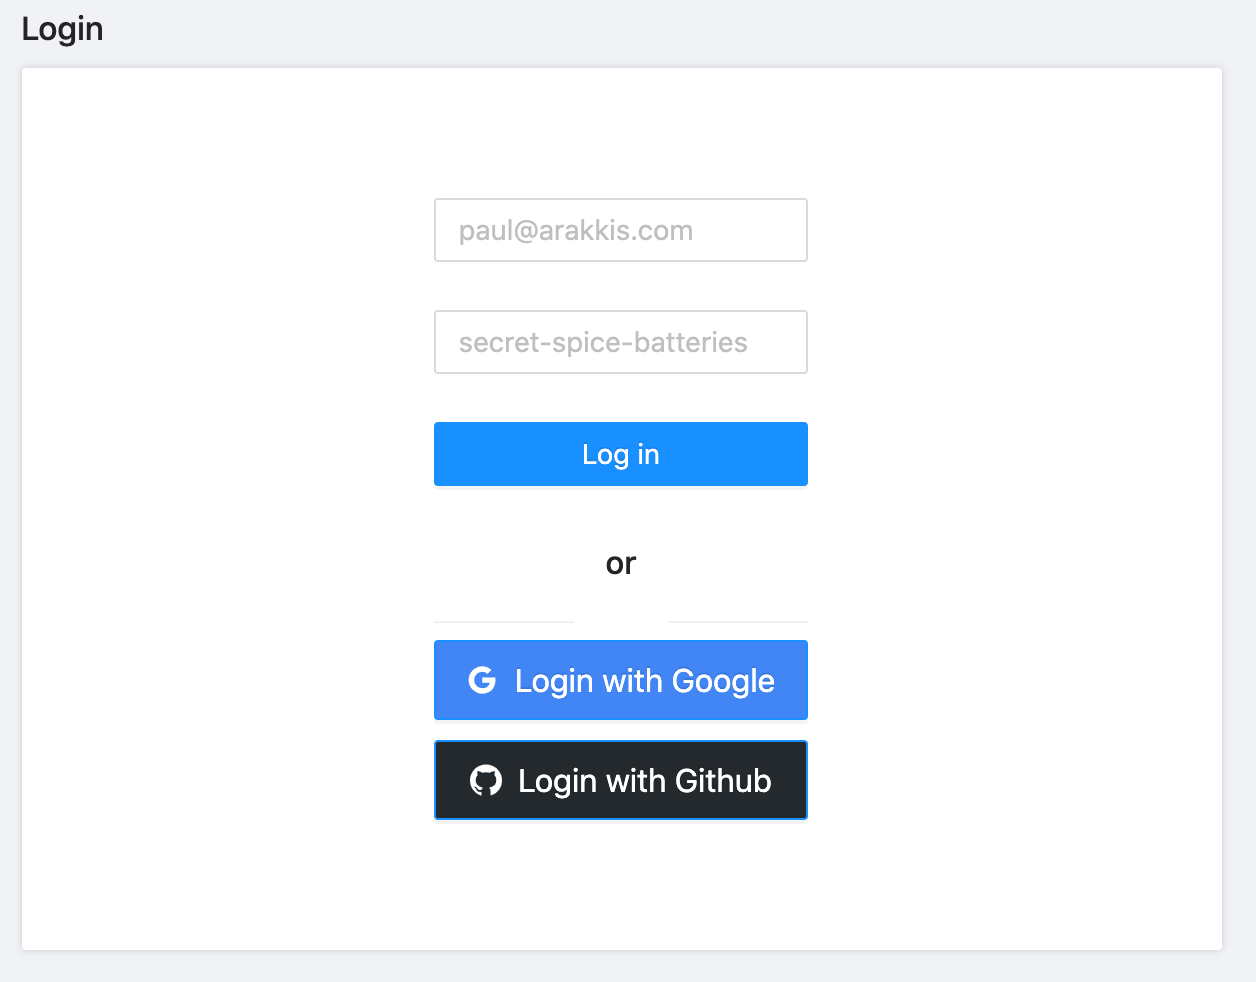
If you login, you'll be seamlessly redirected back to the Spacebank app.
But <DecodeProvider /> doesn't just enforce login. The provider is also the powerhouse behind data fetching with Decode.
Now that the provider is in place, you can seamlessly fetch data from back-end resources. Let's start with having you pull listTransactions into a table.
<ConnectedTable />
Decode provides both hooks and components that are pre-integrated with the Decode back-end. The first one we're going to look at is <ConnectedTable />. You're going to love it.
In the Spacebank React app's Codesandbox, open up the file pages/index.tsx. This file has some scaffold in it already, which we'll touch on in a bit.
Scroll down and replace this placeholder:
<div className="table-placeholder">
  <span>Table will go here</span>
</div>
With this:
<ConnectedTable fetchKey="listTransactions" />
Save, and your table - complete with data from your database - will greet you:
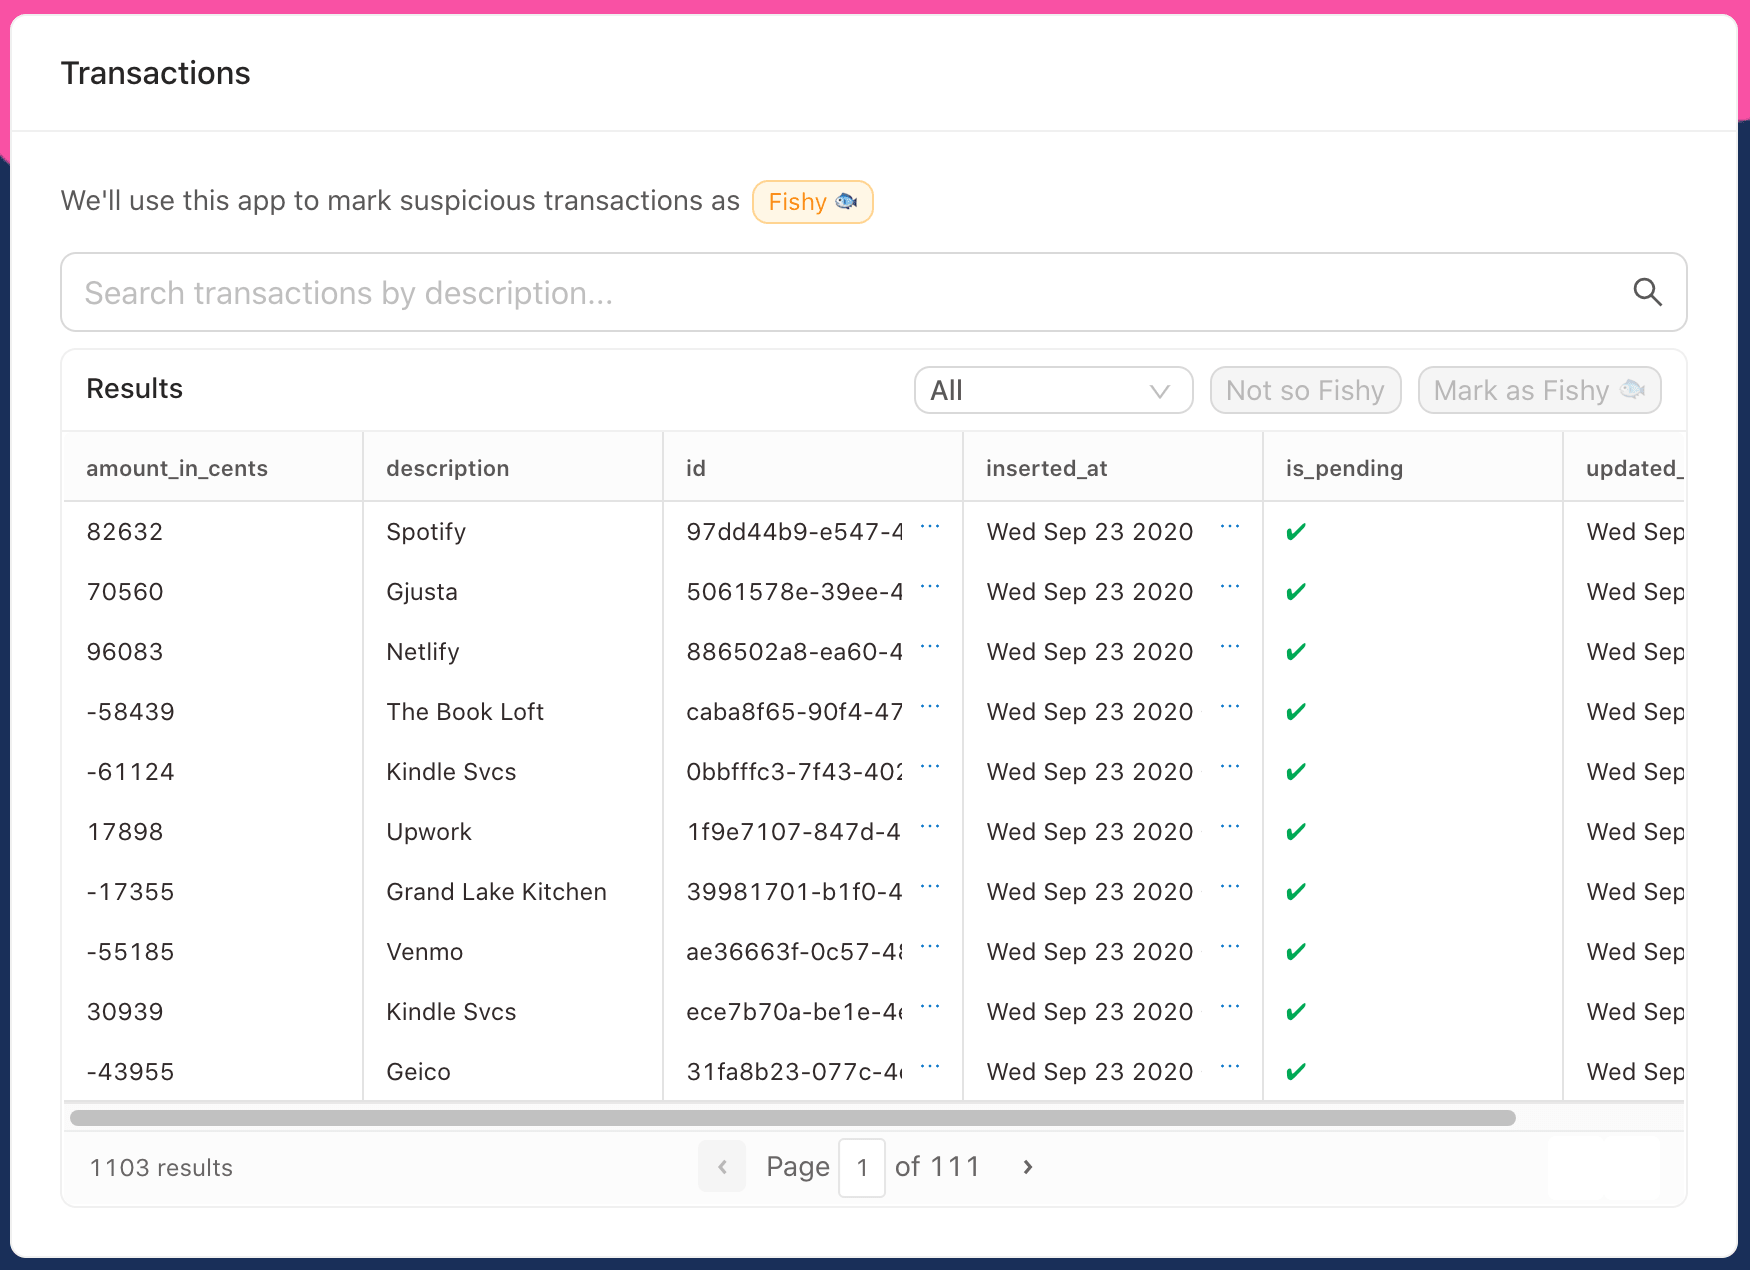
<ConnectedTable />, which automagically pulls data from Decode.
Just a few lines of code, and we have a React app protected by authentication that's pulling in data to a table via a SQL statement!
<ConnectedTable /> dynamically generated default columns. They don't look bad, but eg amount_in_cents could use some formatting.
You can pass in a columns prop to <ConnectedTable /> to configure the columns. We already set up some good defaults for you - just go ahead and add this line:
<ConnectedTable fetchKey="listTransactions" columns={memoizedColumns} />
If you look higher up in the file, you'll see where memoizedColumns is defined. We want to memoize the columns, because if we don't, <ConnectedTable /> will recompute the table on every render.
Last, while you're here, set the onSelectRow property of the <ConnectedTable /> . You want it to set the selectedTransactionId state variable (defined at the top of the component) whenever the user selects a row:
<ConnectedTable
  fetchKey="listTransactions"
  columns={memoizedColumns}
  onSelectRow={(row: any) => setSelectedTransactionId(row.id)}
/>
With memoizedColumns in place, your table should be looking great!
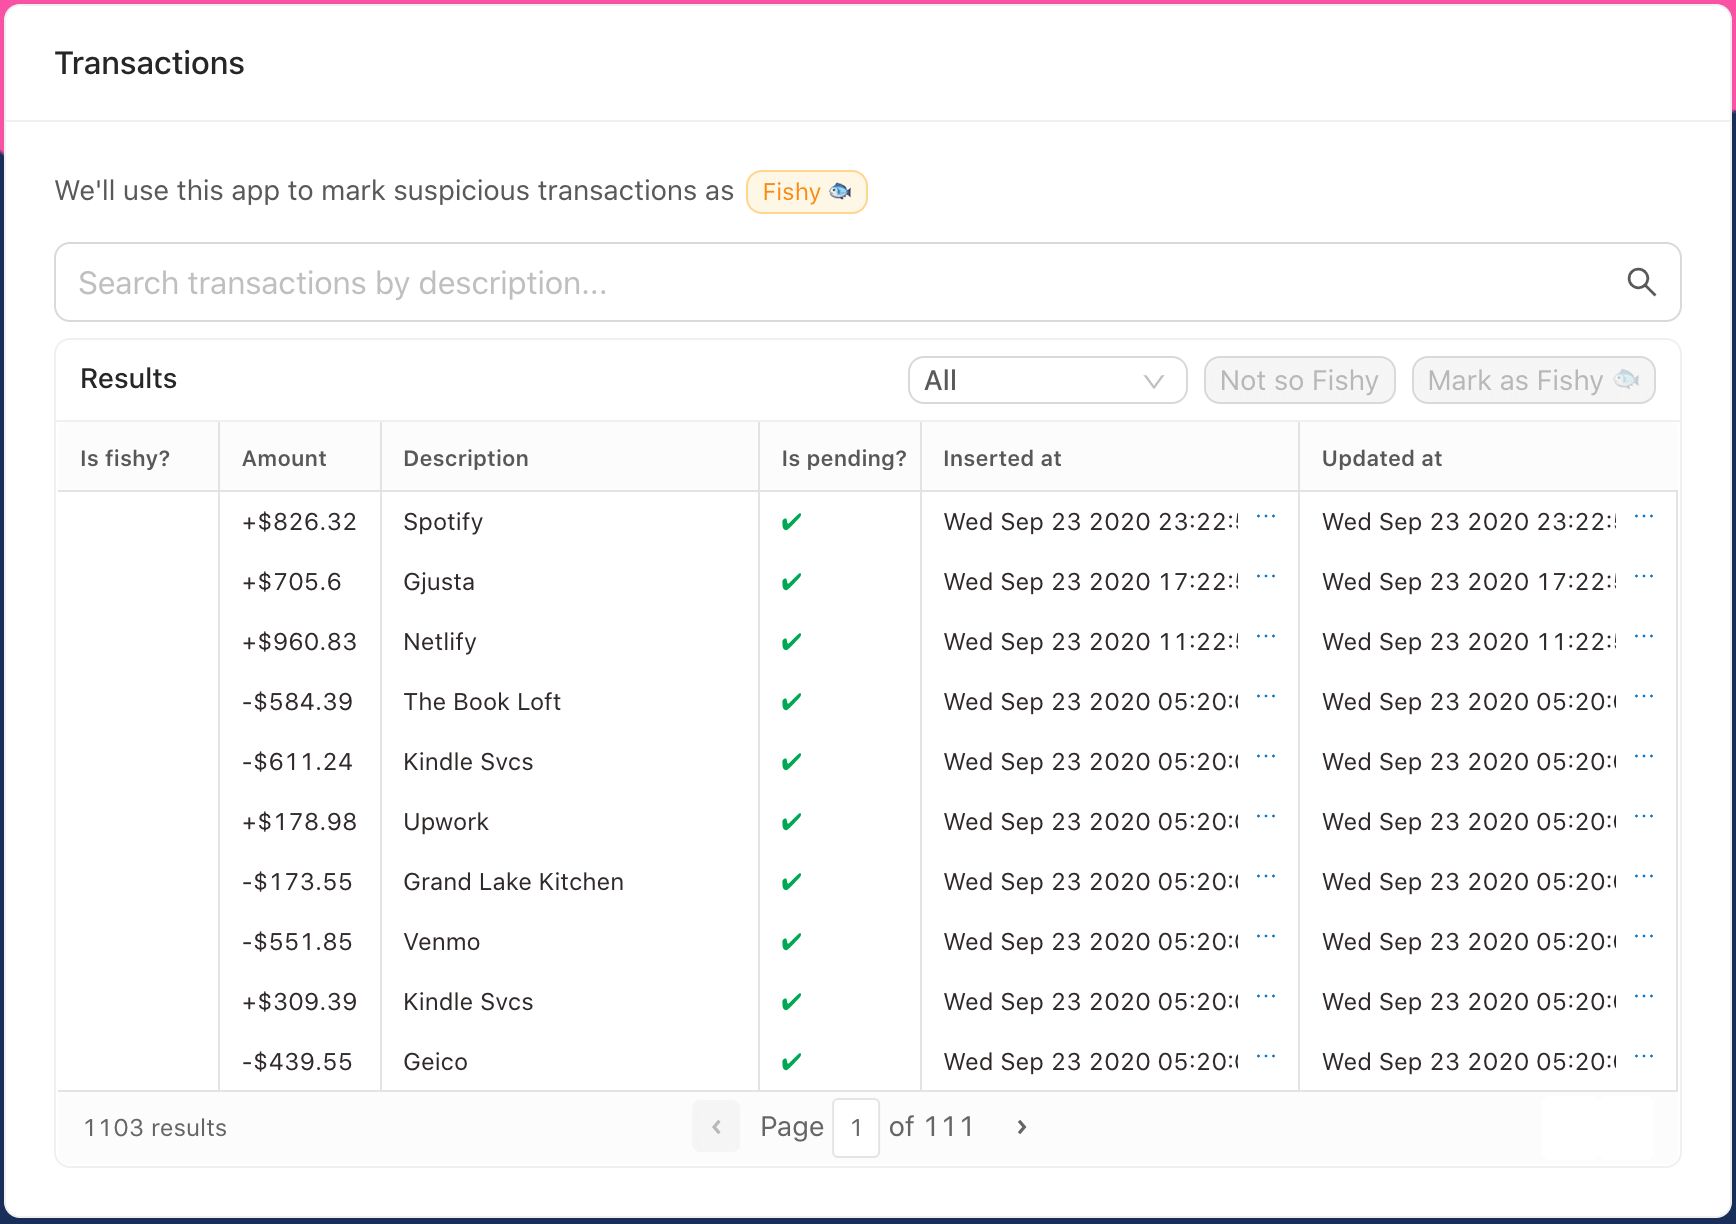
<ConnectedTable />, with prettier, formatted columns.
And if you select a row, you'll see the action buttons "Not so Fishy" and "Mark as Fishy" light up, as a row is selected. (But, they don't do anything just yet.)
As a next step, let's add some interactivity to your app. We'll start with the transaction filtering. A user can filter transaction by:
- entering a search query (which searches the
descriptioncolumn) - selecting a time filter from the drop-down
Underneath the hood, <ConnectedTable /> wraps the most popular React table library, React Table. The component configures React Table with styles, sane defaults, and, of course, data fetching from Decode.
We're still building out the docs for <ConnectedTable />. But the docs for React Table largely apply.
Adding variables to queries
Right now, your listTransactions query grabs all the transactions from the database. You can make it more powerful by weaving in variables.
Hop back over to your query in the Decode dashboard. Go ahead and modify the query accordingly:
SELECT * FROM transactions
WHERE LOWER(description) LIKE LOWER({{description}})
and inserted_at > {{after}}
ORDER BY inserted_at DESC LIMIT 10000;
When it's typed out, you'll notice that Decode highlights the variables in the query:

This query now accepts two variables which act like filters on the data:
description, which we wrap in SQL'sLOWER(), just to make the comparison case insensitiveafter, which is your date filter
You could write a separate query, searchTransactions, which uses these two variables. Then, listTransactions is used whenever there are no filters and searchTransactions is used when there are filters. But we'll see in a moment that it's not much hassle to just reuse the same query in all situations.
Click "Test." You'll be prompted to enter values for each variable that Decode can use to test your query. Use the variables below:
%erewhon%1970-01-01T00:00:00.001Z
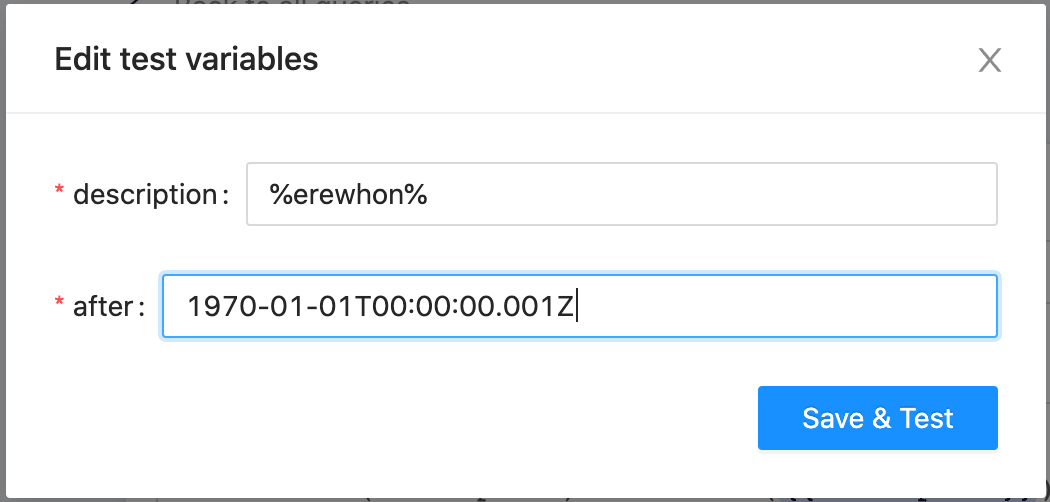
Variable values that will be used to test the query.
We know. You're like - "You're going to make me type in a timestamp whenever I want to test this query??" We are going to make this part way easier very soon. Stick with us.
Hit "Save & Test." If you look at the results returned, you'll only see transactions from Erewhon in the response. (Someone has an addiction. 👀)
Click "Save" to save your query.
Until we improve defining test variables, you always have the option to skip database query tests. Just click the "..." next to the "Save" button and click "Skip Tests & Save."
Now, if you flip back over to Spacebank, you'll find that there's an error!
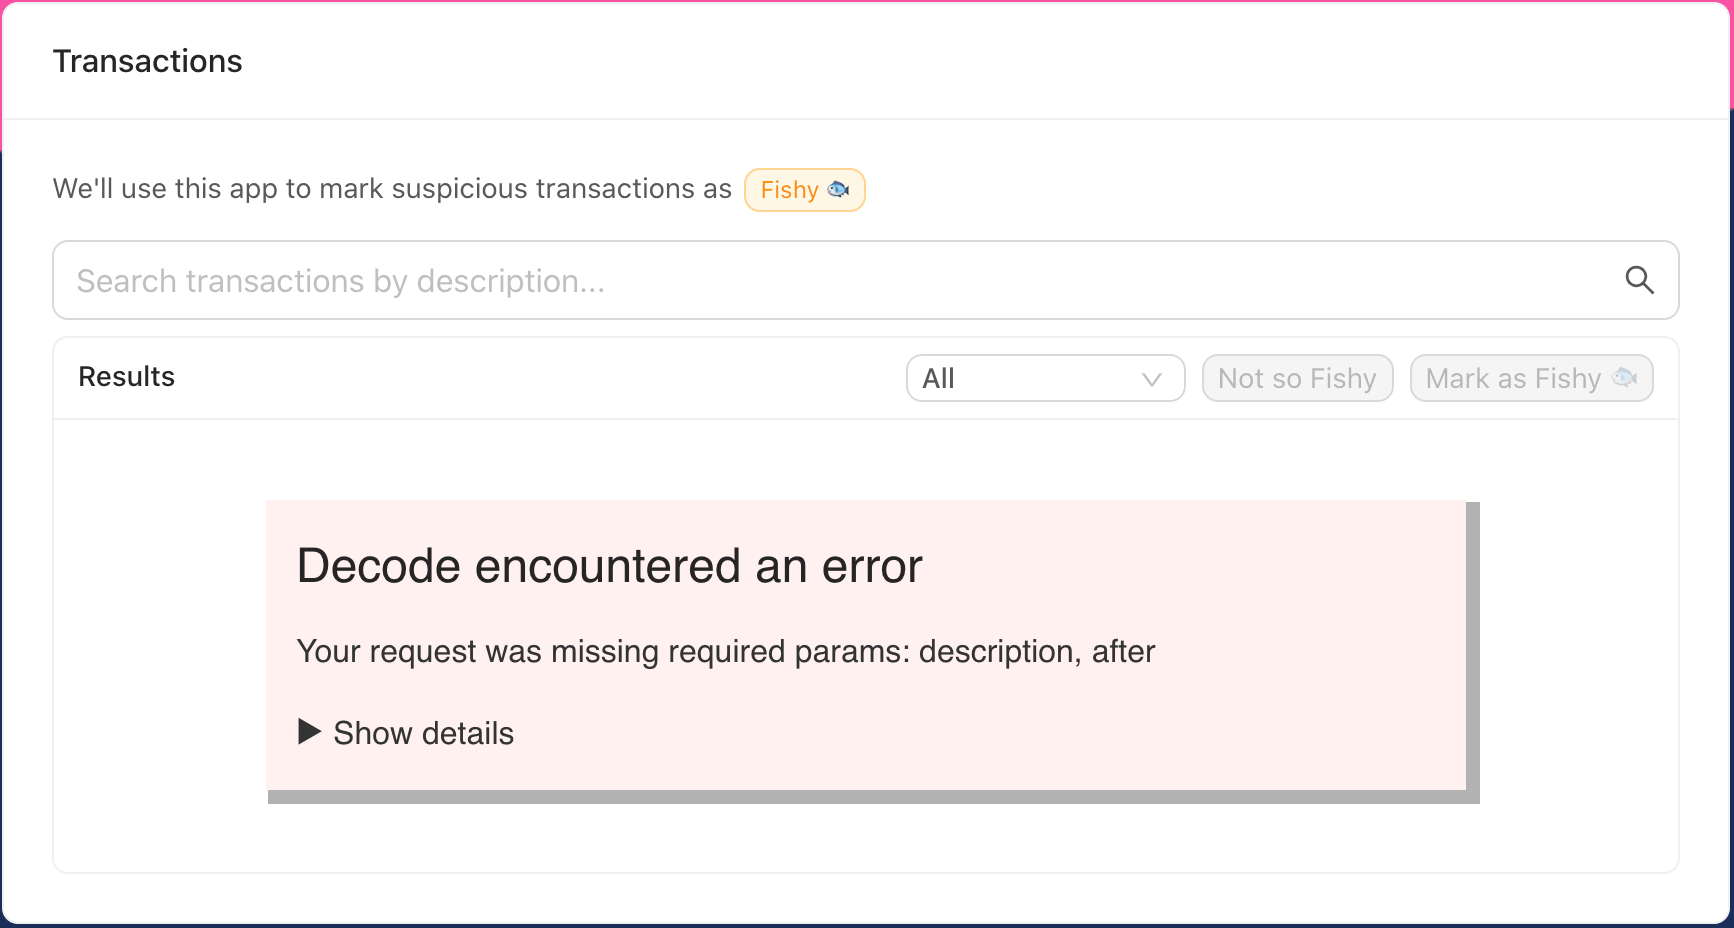
Behind the scenes, all Decode components and hooks poll on occasion for new data to make sure the React app has the latest stuff. Because you re-focused on the Spacebank window, <ConnectedTable /> attempted to re-fetch the query. Except now, the query requires your two new variables.
Let's feed those variables to <ConnectedTable /> now.
Starting with description, you'll note that the search input on this page is already hooked up to state:
export default function App() {
// ...
  let [search, setSearch] = useState("");
  let debouncedSearch = useDebounce(search, 500);

  // later, in render()...
  <SearchInput value={search} onChange={setSearch} />
If you connected search right to <ConnectedTable />, then every single keystroke would fire off a request to Decode. While our servers welcome the challenge, this is inefficient.
Instead, you want to debounce the search value - wait until 500ms have passed since the user's last keystroke and then fire off the search.
useDebounce() is a simple convenience hook we included which does just that. You'll supply the debounced value it returns to <ConnectedTable /> as opposed to search.
Then, for the after filter, that's also controlled in state at the top:
export default function App() {
  // ...
  let [dateFilter, setDateFilter] = useState("all");
You can use the function below App , dateFromFilter(), to convert the human-friendly drop-down values of "All", "Last 7 days", and "Last two weeks" into ISO8601 timestamps that Decode and your database will be happy with.
Decode will try to securely cast variables into a format appropriate for the database column you are querying against.
Note that casting is very limited for MySQL and MSSQL databases. If you run into problems, let us know.
Ok, with that context in place, go ahead and update the fetchKey for <ConnectedTable />:
<ConnectedTable
  fetchKey={[
    "listTransactions",
    {
      description: `%${debouncedSearch}%`,
      after: dateFromDateFilter(dateFilter),
    },
  ]}
  columns={memoizedColumns}
  onSelectRow={(row: any) => setSelectedTransactionId(row.id)}
/>
Your fetchKey is now an array, as it's a composite of the query (listTransactions) and your variables (description and after). When using fetch keys with Decode hooks and components, they will always be formatted like this.
Note that above, debouncedSearch is wrapped in %% - this will give you a fuzzy match on description, which is preferable here.
Go ahead and save and try it out! Typing in gjusta filters the results:
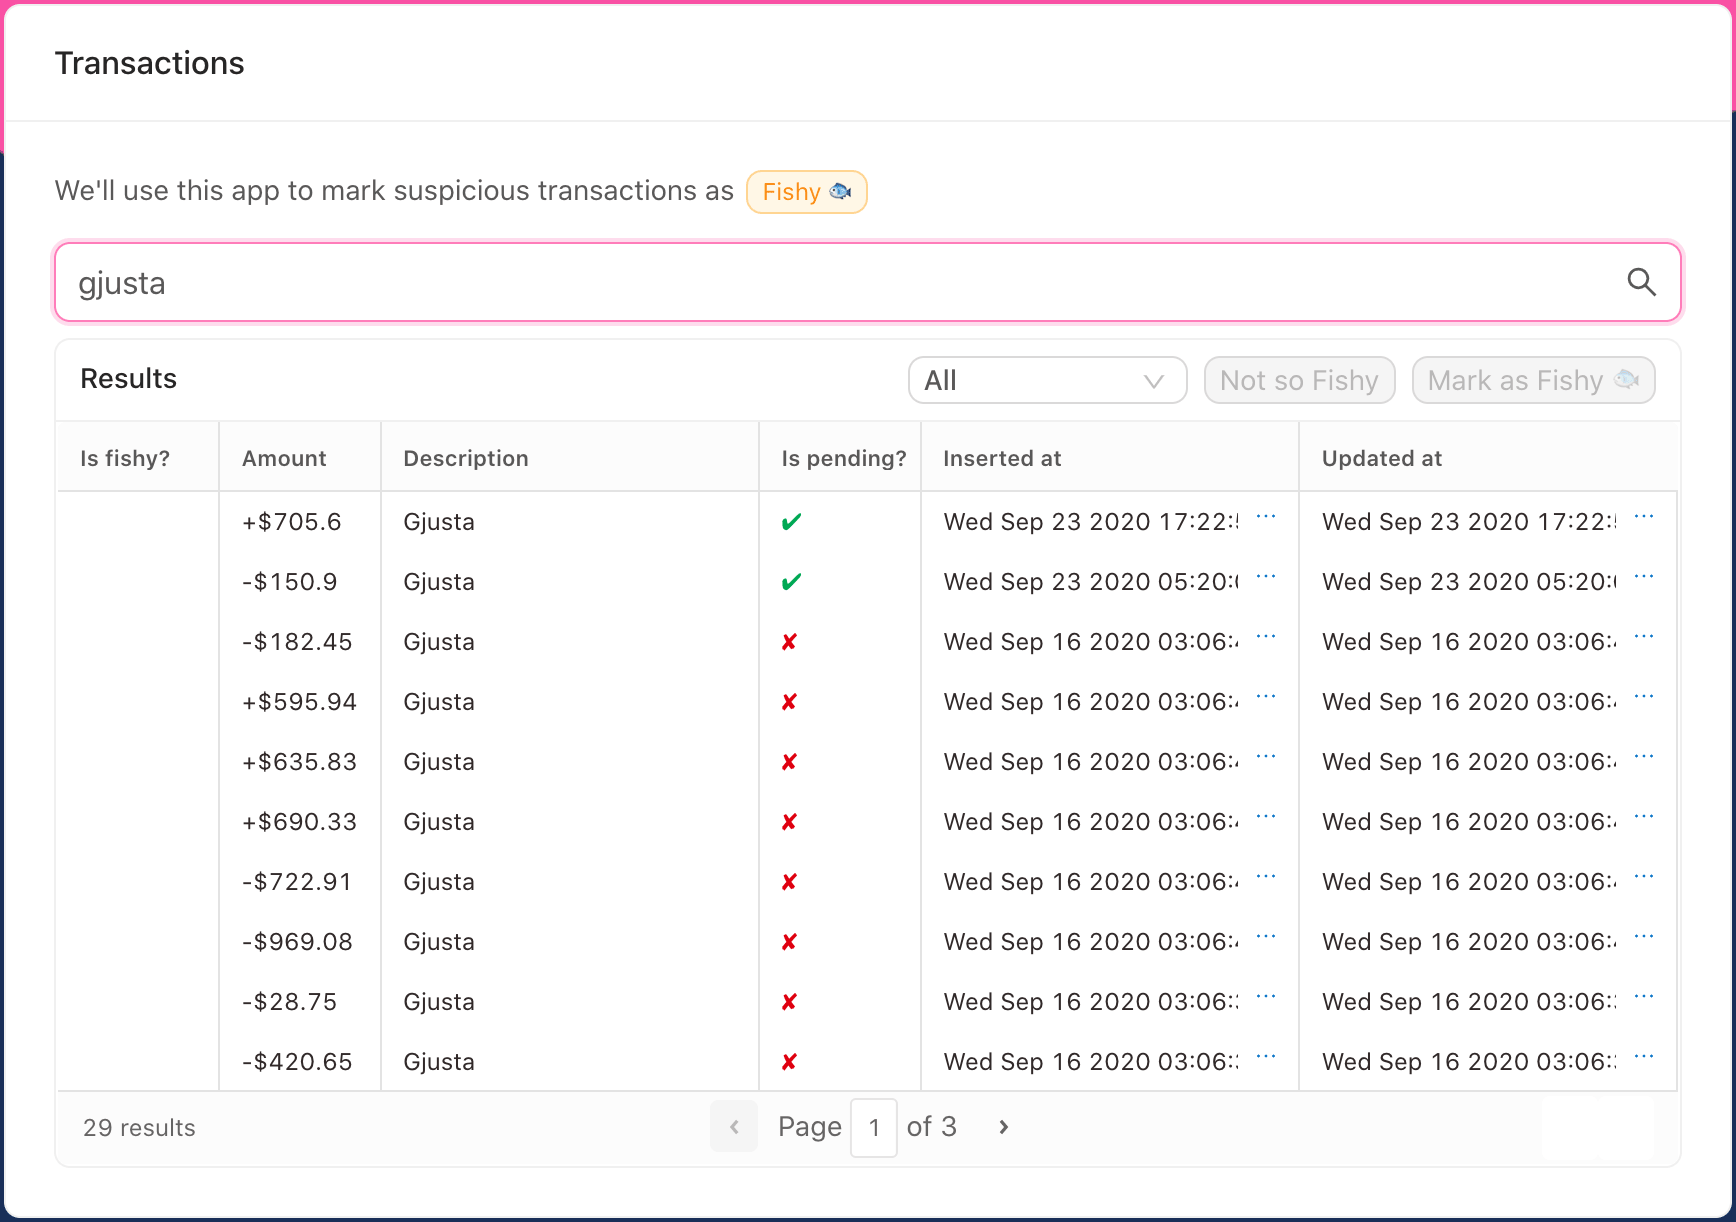
Someone has a serious Postmates problem.
This app is getting pretty powerful. It's wrapped in authentication. You can now filter transactions by their description or their recency. And you can sort and page through the results.
But it's missing the core functionality: marking suspicious transactions as fishy.
For the home stretch, you'll quickly set up three HTTP queries on Decode:
listTaggedTransactionIds- grabs the ids of transactions marked "fishy"tagTransaction- marks the transaction as "fishy"untagTransaction- removes the "fishy" tag
Then, you'll wire up the React app to these HTTP endpoints with Decode.
Underneath the hood, Decode hooks and components use Vercel's SWR. A lot of the documentation for that project applies to Decode's data-fetching paradigm. In fact, you can tweak Decode's SWR instance by passing in a config object like this: <DecodeProvider swrConfig={{ /* your config */ }} /> .
If you're familiar with SWR, there are a couple key differences though. One that you may have noticed above: You don't have to worry about memoizing the object in the fetchKey array. The Decode client takes care of that for you.
Adding HTTP queries
As you saw earlier, your account comes pre-populated with one HTTP resource, the Spacebank API. This API is protected by an auth token, which we kindly supplied for you.
To read and write tags, you'll use this HTTP resource as opposed to the database.
Head back over to queries and click "Add query," then select "Spacebank - API."
This first request will get a GET request to grab the list of IDs for transactions marked fishy:
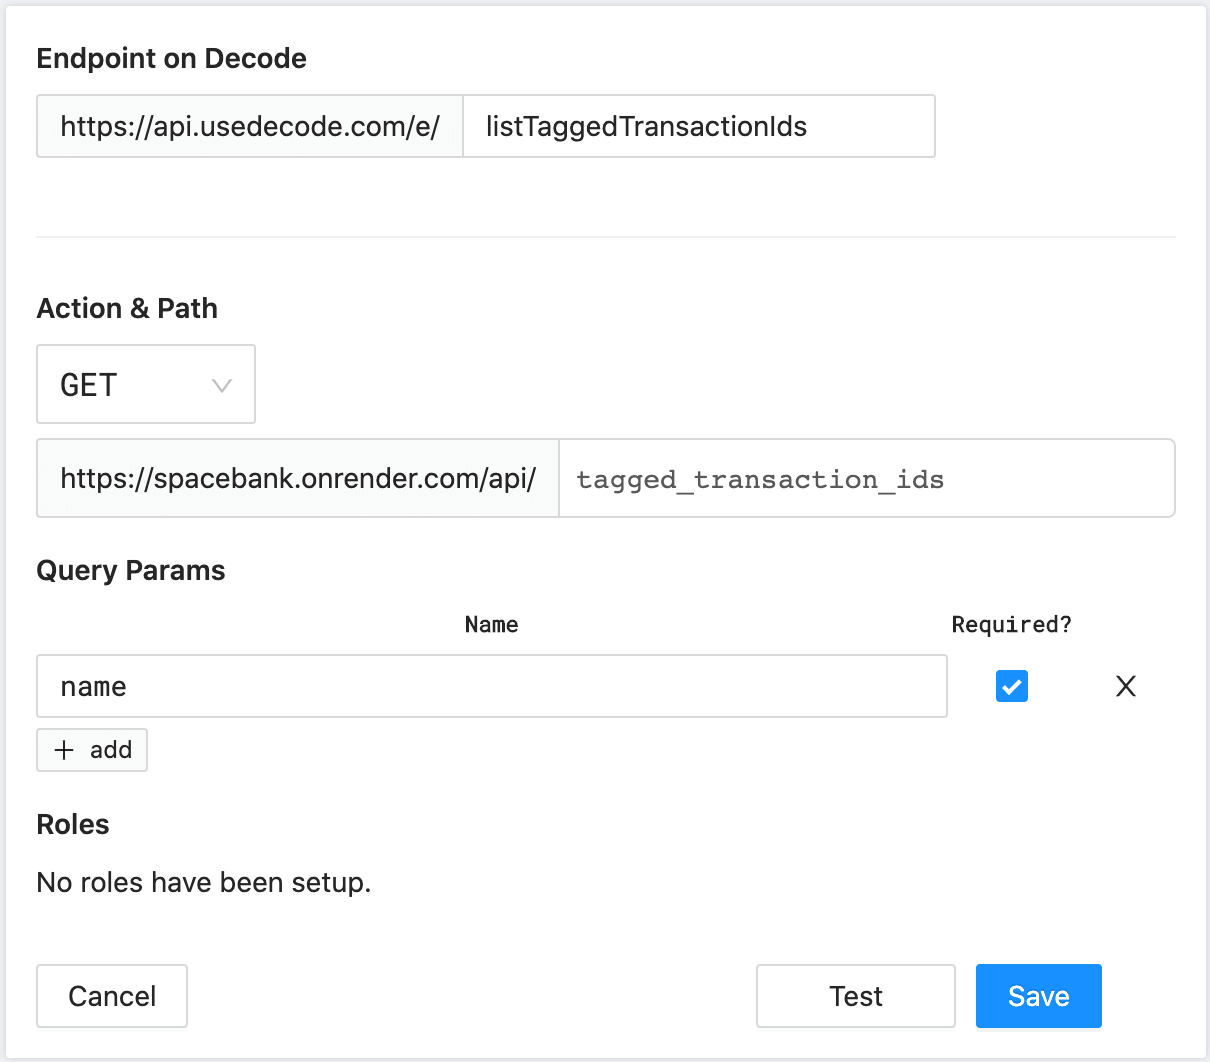
Like before, listTaggedTransactionIds is the endpoint you're creating on Decode - the slug of the query.
Below that, you define the HTTP request that you want Decode to make against the Spacebank API to retrieve data. Here, you're specifying a GET request to the path /tagged_transaction_ids.
That endpoint requires one query param, name . This will be the name of the tag (in the case of this app, it will always be the value "fishy" ).
Once you've filled in the details, click "Test." This will open the HTTP testing window. Fill in the value "fishy" for the name param and click "Run test":

The result shows the result returned straight from https://spacebank.onrender.com/api/tagged_transaction_ids. As you can see, ids is an empty array. Because no one has tagged any transactions as "fishy" yet. (You need to get this app over to Spacebank Risk, stat!)
Click "Save." Now, add the query for creating a tag by following the same flow of "Add Query → Spacebank - API":
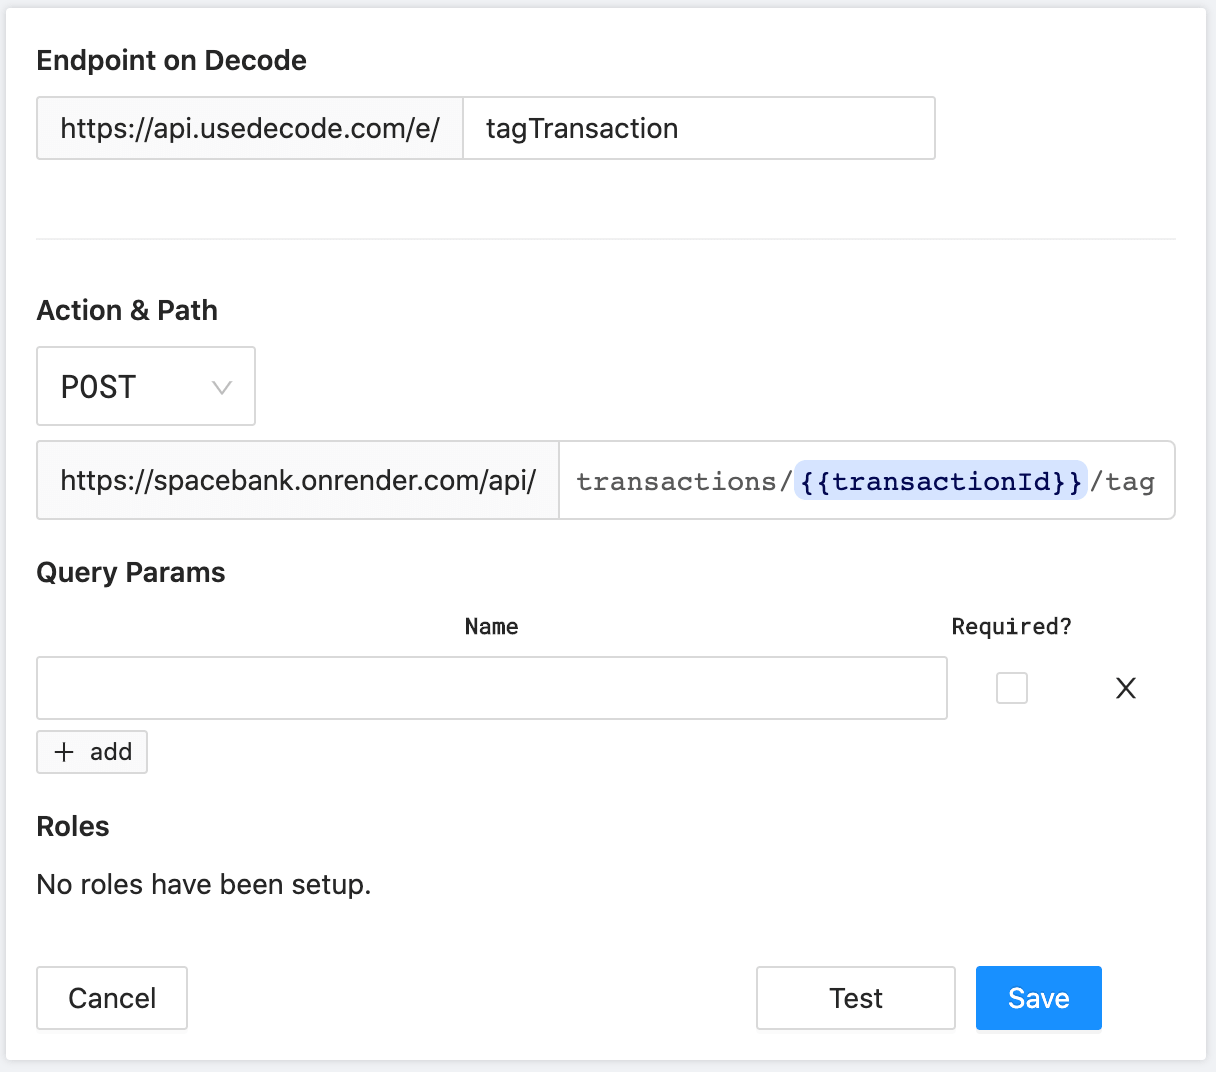
This time, it's a POST to /transactions/{{transactionId}}/tag. You're using a variable in the path, transactionId.
This particular request requires a body in the request, like this: { "name": "fishy" }. You don't define the body here though - it will be part of the fetch key. You'll see that come into play in a moment.
This one will be harder to test as you don't have an ID handy, so just click "Save."
Now for the last query. "Add Query" again, this time it's a DELETE to the same path as above:
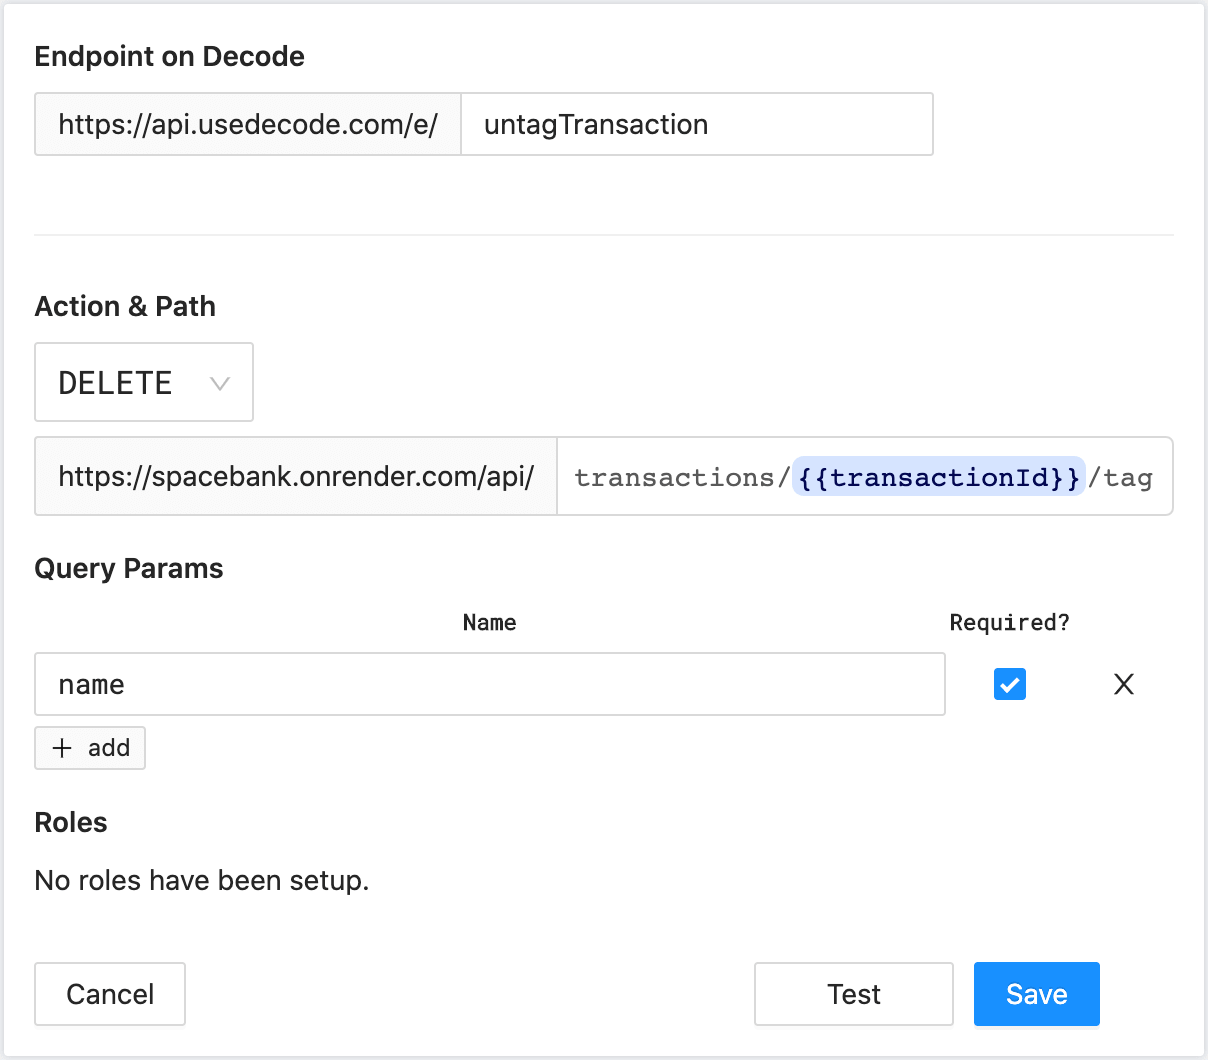
Ok, these queries are ready to go - Decode is fully setup now.
Hop back over to the Spacebank code. This first thing you'll do is pull in the list of fishy transaction ids via the query listTaggedTransactionIds.
Un-comment this section:
// Retrieve transactions tagged Fishy from api using Decode
// TODO: let { data, mutate } = useDecode<ListTaggedTransactionIds>([])
And fill it out, like this:
let { data, mutate } =
  useDecode <
  ListTaggedTransactionIds >
  ["listTaggedTransactionIds", { name: "fishy" }];
Then below that, modify fishyIds like so:
let fishyIds = data?.ids || [];
Breaking this down:
- You're now using the
useDecode()hook. This hook is central to data-fetching with Decode. In fact, all Decode components just use this hook for data-fetching underneath the hood.- This hook returns
data, the result from Decode, andmutate. You'll seemutateused in just a moment.
- This hook returns
- Notice that the fetch key supplied to the
useDecode()hook matches the format you used for<ConnectedTable />- it's a composite of the slug and the required variable,name(which in this case is assigned to a query parameter). useDecode()can accept a type argument, which will define the type ofdata. Here, the type argument isListTaggedTransactionIds. (This is a TypeScript thing - if you don't know TypeScript, feel free to ignore! This type argument is completely optional.)- Last, note that
fishyIdsnow tries to grab the ids from thedataobject.
fishyIds is fed into the memoizedColumns below. The fishyColumn logic takes care of displaying a fish emoji if a given row has been marked fishy. So you're all set here!
Next, you just need to wire up the "Mark as Fishy" and "Not so Fishy" buttons.
So far, the hooks and components you've used have been performing reads. To create and delete tags, you'll have to do writes.
As you may know, React hooks are not a good fit for writes. Instead, you just want a function you can call one-off whenever the user clicks one of the two buttons.
Decode provides the useRequest() hook for that. That hook returns a function that you can then use to make one-off requests to Decode.
Write the handler functions first, then you'll wire them up to the buttons after. You can put these right below the code you just wrote:
// Used for one-time requests using Decode
let { request, isProcessing } = useRequest();

// Marks a transaction as fishy
let markAsFishy = async () => {
  await request([
    "tagTransaction",
    {
      transactionId: selectedTransactionId,
      body: { name: "fishy" },
    },
  ]);
  await mutate();
};

// Remove the fishy tag from a transaction
let markNotFishy = async () => {
  await request([
    "untagTransaction",
    {
      transactionId: selectedTransactionId,
      name: "fishy",
    },
  ]);
  await mutate();
};
Both functions make use of the request() function returned by useRequest().
Both request() invocations supply the required path parameter, transactionId. They also both supply the tag name "fishy." Except, for tagging transactions, the Spacebank API expects the name to be sent in the body of the request. So, you can see that for tagTransaction, you specify a body property. Decode will proxy whatever is in this body property up to the target API.
After you make a request to update the list of fishy transaction ids through Decode, you need to update your local list of those ids: the lazy way and the eager way.
The above example demonstrates the lazy way: Right below each request() call, mutate() is invoked. This was the function returned by the useDecode() call to grab the list of fishy transaction ids. Calling mutate invalidates the local cached copy of transaction ids, forcing useDecode() to immediately re-fetch.
That's one way to get the updated list - just let the server supply it!
The eager way would be to pass in the new list of ids to mutate(), like this (for markAsFishy):
await mutate({ ids: fishyIds.concat(selectedTransactionId) });
This is also known as an optimistic update. This is totally fine, but we're taking the lazy path through this tutorial 😛
For more details on how mutate works, check out the SWR docs, as this is the core of the mutate function returned by useDecode() .
Now that your handler functions are ready, just connect them to the buttons. You can also set the processing prop to isProcessing, which is returned by useRequest:
<TransactionsTableCard
  processing={isProcessing} // here
  disableButtons={!selectedTransactionId}
  onFishyClick={markAsFishy} // here
  onClearClick={markNotFishy} // and here
  onDateFilterChange={setDateFilter}
>
And just like that - you have yourself a real app!
Go ahead and try it out. Now you can filter, sort, and mark suspicious transactions as fishy:
As a recap, here's how you got here:
- You wrapped your top-level component in
<DecodeProvider />, which instantly wrapped your app in authentication. - You wrote a SQL query against the Spacebank database which included some variables for filtering transactions.
- You wrote a few HTTP queries that call endpoints on the Spacebank API
- On the front-end you used a few different Decode tools to orchestrate data:
<ConnectedTable />to display the table of transactionsuseDecode()to grab the list of fishy transaction ids- And
useRequest()to get a function for making one-off requests to Decode
You've made it this far - we'd love to hear what you thought, and what you want to build next! Please, drop us a line: founders@usedecode.com.
<ConnectedTable /> is the only component we currently provide. We're starting here because a great table component is cornerstone to internal tools. But we'll be adding all sorts of components in the coming weeks. Have one you'd love to see? Let us know.